Mailman: Difference between revisions
imported>Benley Add TOC and upstream docs link |
imported>Benley Explain social logins |
||
| Line 1: | Line 1: | ||
__TOC__ | __TOC__ | ||
= Running Mailman on NixOS = | |||
Requires at least NixOS 20.03; the <code>services.mailman</code> module in NixOS 19.09 is insufficient. | Requires at least NixOS 20.03; the <code>services.mailman</code> module in NixOS 19.09 is insufficient. | ||
| Line 11: | Line 11: | ||
* letsencrypt to acquire TLS certificates for nginx | * letsencrypt to acquire TLS certificates for nginx | ||
== Deployment steps == | |||
* Edit <code>/etc/nixos/configuration.nix</code> and add this stuff: | * Edit <code>/etc/nixos/configuration.nix</code> and add this stuff: | ||
| Line 122: | Line 122: | ||
At this point you should have a working Mailman installation. Create and manage lists using the web interface or the <code>mailman</code> commandline tool, and refer to the [https://docs.mailman3.org/ upstream documentation] for lots more information. | At this point you should have a working Mailman installation. Create and manage lists using the web interface or the <code>mailman</code> commandline tool, and refer to the [https://docs.mailman3.org/ upstream documentation] for lots more information. | ||
== Optional extras == | |||
=== Social logins === | |||
Mailman 3 uses [https://django-allauth.readthedocs.io/ django-allauth] to allow logins via many external auth providers, such as GitHub and Google. To enable these we need to update our Django settings and add some per-provider specifics in the admin UI. | |||
In this example we're just adding GitHub, but there are [https://django-allauth.readthedocs.io/en/latest/providers.html lots of other providers] available. | |||
* Add to your <code>configuration.nix</code> and run <code>nixos-rebuild switch</code>: | |||
<syntaxhighlight lang="nix"> | |||
# Extend the django settings.py directly since this can't all be | |||
# done via JSON settings (services.mailman.webSettings) | |||
environment.etc."mailman3/settings.py".text = '' | |||
INSTALLED_APPS.extend([ | |||
"allauth.socialaccount.providers.github", | |||
]) | |||
''; | |||
</syntaxhighlight> | |||
* Register a new OAuth application on GitHub at https://github.com/settings/applications/new. Your Authorization Callback URL will be <code>https://<your_mailman_hostname>/accounts/github/login/callback/</code>. Save the Client ID and Client Secret that GitHub gives you at the end of this process. | |||
* Navigate to <code>https://<your_mailman_hostname>/admin/socialaccount/socialapp/add/</code> and fill in the values you got from GitHub. Make sure you click '''Choose all''' to enable this auth provide for your django site, then click '''Save'''. | |||
*: [[File:Django_admin_add_social_application.png]] | |||
Now you should be able to login to your mailman site with GitHub, and see your account's connections at <code>https://<your_mailman_hostname>/accounts/social/connections/</code> | |||
Revision as of 07:24, 20 February 2020
Running Mailman on NixOS
Requires at least NixOS 20.03; the services.mailman module in NixOS 19.09 is insufficient.
This example includes:
- Postfix as the MTA
- uwsgi to host Mailman's web interface and archives (Postorius and Hyperkitty)
- nginx to terminate TLS, proxy to uwsgi, and serve static assets
- letsencrypt to acquire TLS certificates for nginx
Deployment steps
- Edit
/etc/nixos/configuration.nixand add this stuff:
{ config, pkgs, ... }:

let
  OWNER_EMAIL = "postmaster@example.org";  # Change this!
  MAILMAN_HOST = "mailman.example.org";    # Change this!
in

{
  services.postfix = {
    enable = true;
    relayDomains = ["hash:/var/lib/mailman/data/postfix_domains"];
    config = {
      transport_maps = ["hash:/var/lib/mailman/data/postfix_lmtp"];
      local_recipient_maps = ["hash:/var/lib/mailman/data/postfix_lmtp"];
    };
  };

  services.mailman = {
    enable = true;
    siteOwner = OWNER_EMAIL;
    webUser = config.services.uwsgi.user;
    hyperkitty.enable = true;
    webHosts = [MAILMAN_HOST];
  };

  # Make sure that uwsgi gets restarted if any django settings change.
  # I'm not sure why this isn't covered by the "before" and
  # "requiredBy" settings present in mailman-web.service. Maybe
  # because it's a oneshot and not a daemon?
  systemd.services.uwsgi.restartTriggers = [
    config.environment.etc."mailman3/settings.py".source
  ];

  # Tweak permissions so nginx can read and serve the static assets
  # (/var/lib/mailman-web defaults to mode 0600)
  systemd.services.uwsgi.preStart = ''
    chmod o+x /var/lib/mailman-web
  '';

  services.uwsgi = {
    enable = true;
    plugins = ["python3"];
    instance = {
      type = "normal";
      pythonPackages = (
        # TODO: I hope there is a nicer way of doing this:
        self: with self.override {
          overrides = self: super: { django = self.django_1_11; };
        }; [ mailman-web ]
      );
      socket = "127.0.0.1:33140";
      wsgi-file = "${config.services.mailman.webRoot}/mailman_web/wsgi.py";
      chdir = "/var/lib/mailman-web";
      master = true;
      processes = 4;
      vacuum = true;
    };
  };

  security.acme.email = OWNER_EMAIL;
  security.acme.acceptTerms = true;

  services.nginx = {
    enable = true;
    recommendedProxySettings = true;
    virtualHosts.${MAILMAN_HOST} = {
      enableACME = true;
      forceSSL = true;
      locations."/static/".alias = "/var/lib/mailman-web/static/";
      locations."/".extraConfig = ''
        uwsgi_pass 127.0.0.1:33140;
        include ${config.services.nginx.package}/conf/uwsgi_params;
      '';
    };
  };

  networking.firewall.allowedTCPPorts = [ 80 443 ];
}
- Install and start the services:
[root@mailman:~]# nixos-rebuild switch
- Generate initial
postfix_domains.dbandpostfix_lmtp.dbdatabases for Postfix:
[root@mailman:~]# sudo -u mailman mailman aliases
- Create a django superuser account. Be careful to run this only as the
uwsgiuser in/var/lib/mailman-webor you will run into permission problems later.
[root@mailman:~]# cd /var/lib/mailman-web
[root@mailman:/var/lib/mailman-web]# sudo -u uwsgi mailman-web createsuperuser
### Using settings module from /etc/mailman3/settings.py   ####
Username (leave blank to use 'uwsgi'): root
Email address: postmaster@example.com
Password:
Password (again):
Superuser created successfully.
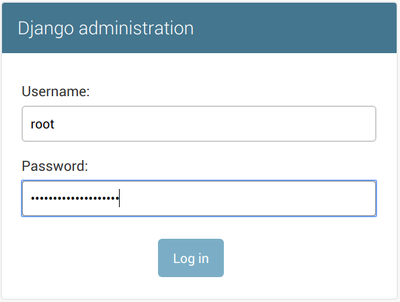
- Navigate to
https://<your_mailman_hostname>/adminin a web browser and login to the Django admin interface:
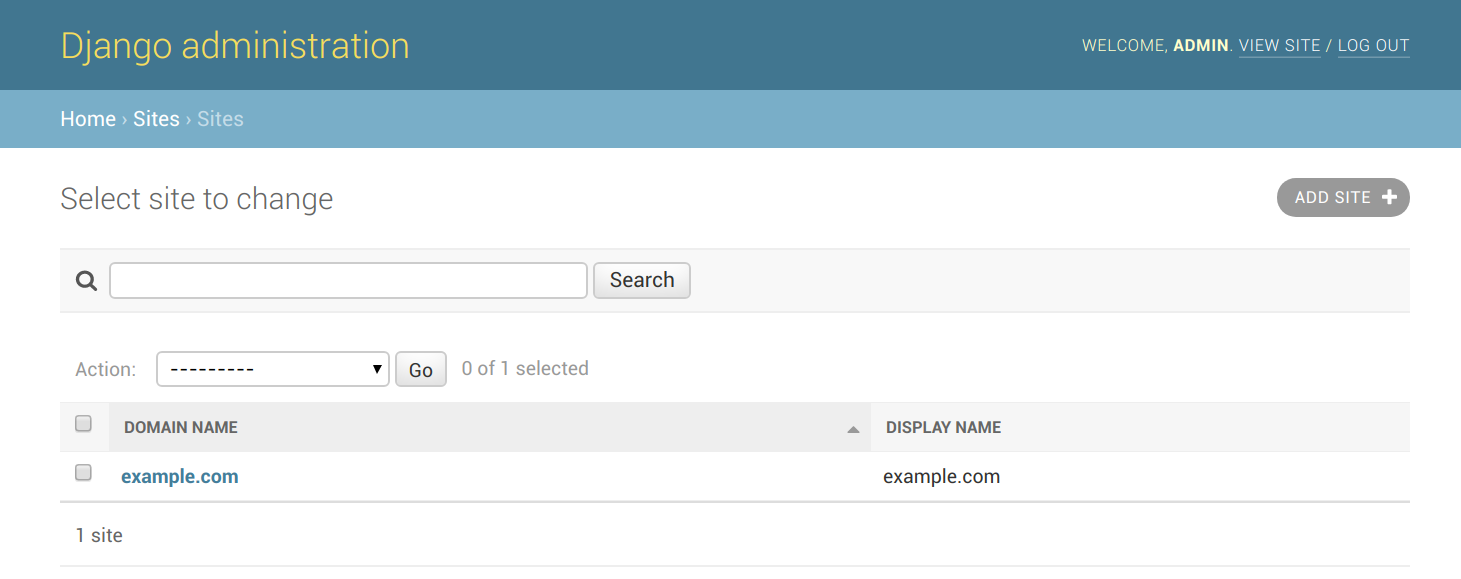
- Navigate to
https://<your_mailman_hostname>/admin/sites/site. Click on the example.com site, change it to your desired domain name, and hit Save. This configures the web serving domain, not the domain used for email.
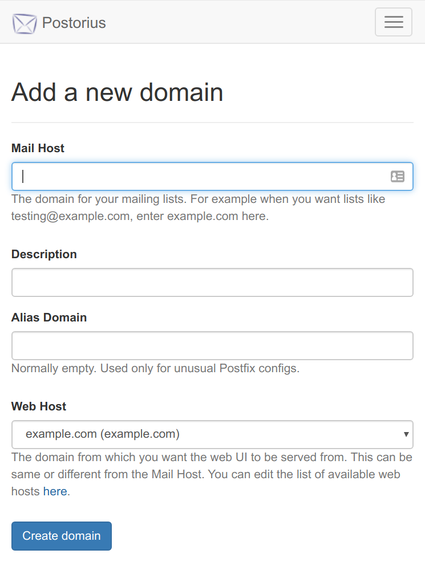
- Navigate to
https://<your_mailman_hostname>/postorius/domains/new/. Fill in the form to add the domain you wish to use for mailing list email addresses.
At this point you should have a working Mailman installation. Create and manage lists using the web interface or the mailman commandline tool, and refer to the upstream documentation for lots more information.
Optional extras
Social logins
Mailman 3 uses django-allauth to allow logins via many external auth providers, such as GitHub and Google. To enable these we need to update our Django settings and add some per-provider specifics in the admin UI.
In this example we're just adding GitHub, but there are lots of other providers available.
- Add to your
configuration.nixand runnixos-rebuild switch:
  # Extend the django settings.py directly since this can't all be
  # done via JSON settings (services.mailman.webSettings)
  environment.etc."mailman3/settings.py".text = ''
    INSTALLED_APPS.extend([
      "allauth.socialaccount.providers.github",
    ])
  '';
- Register a new OAuth application on GitHub at https://github.com/settings/applications/new. Your Authorization Callback URL will be
https://<your_mailman_hostname>/accounts/github/login/callback/. Save the Client ID and Client Secret that GitHub gives you at the end of this process.
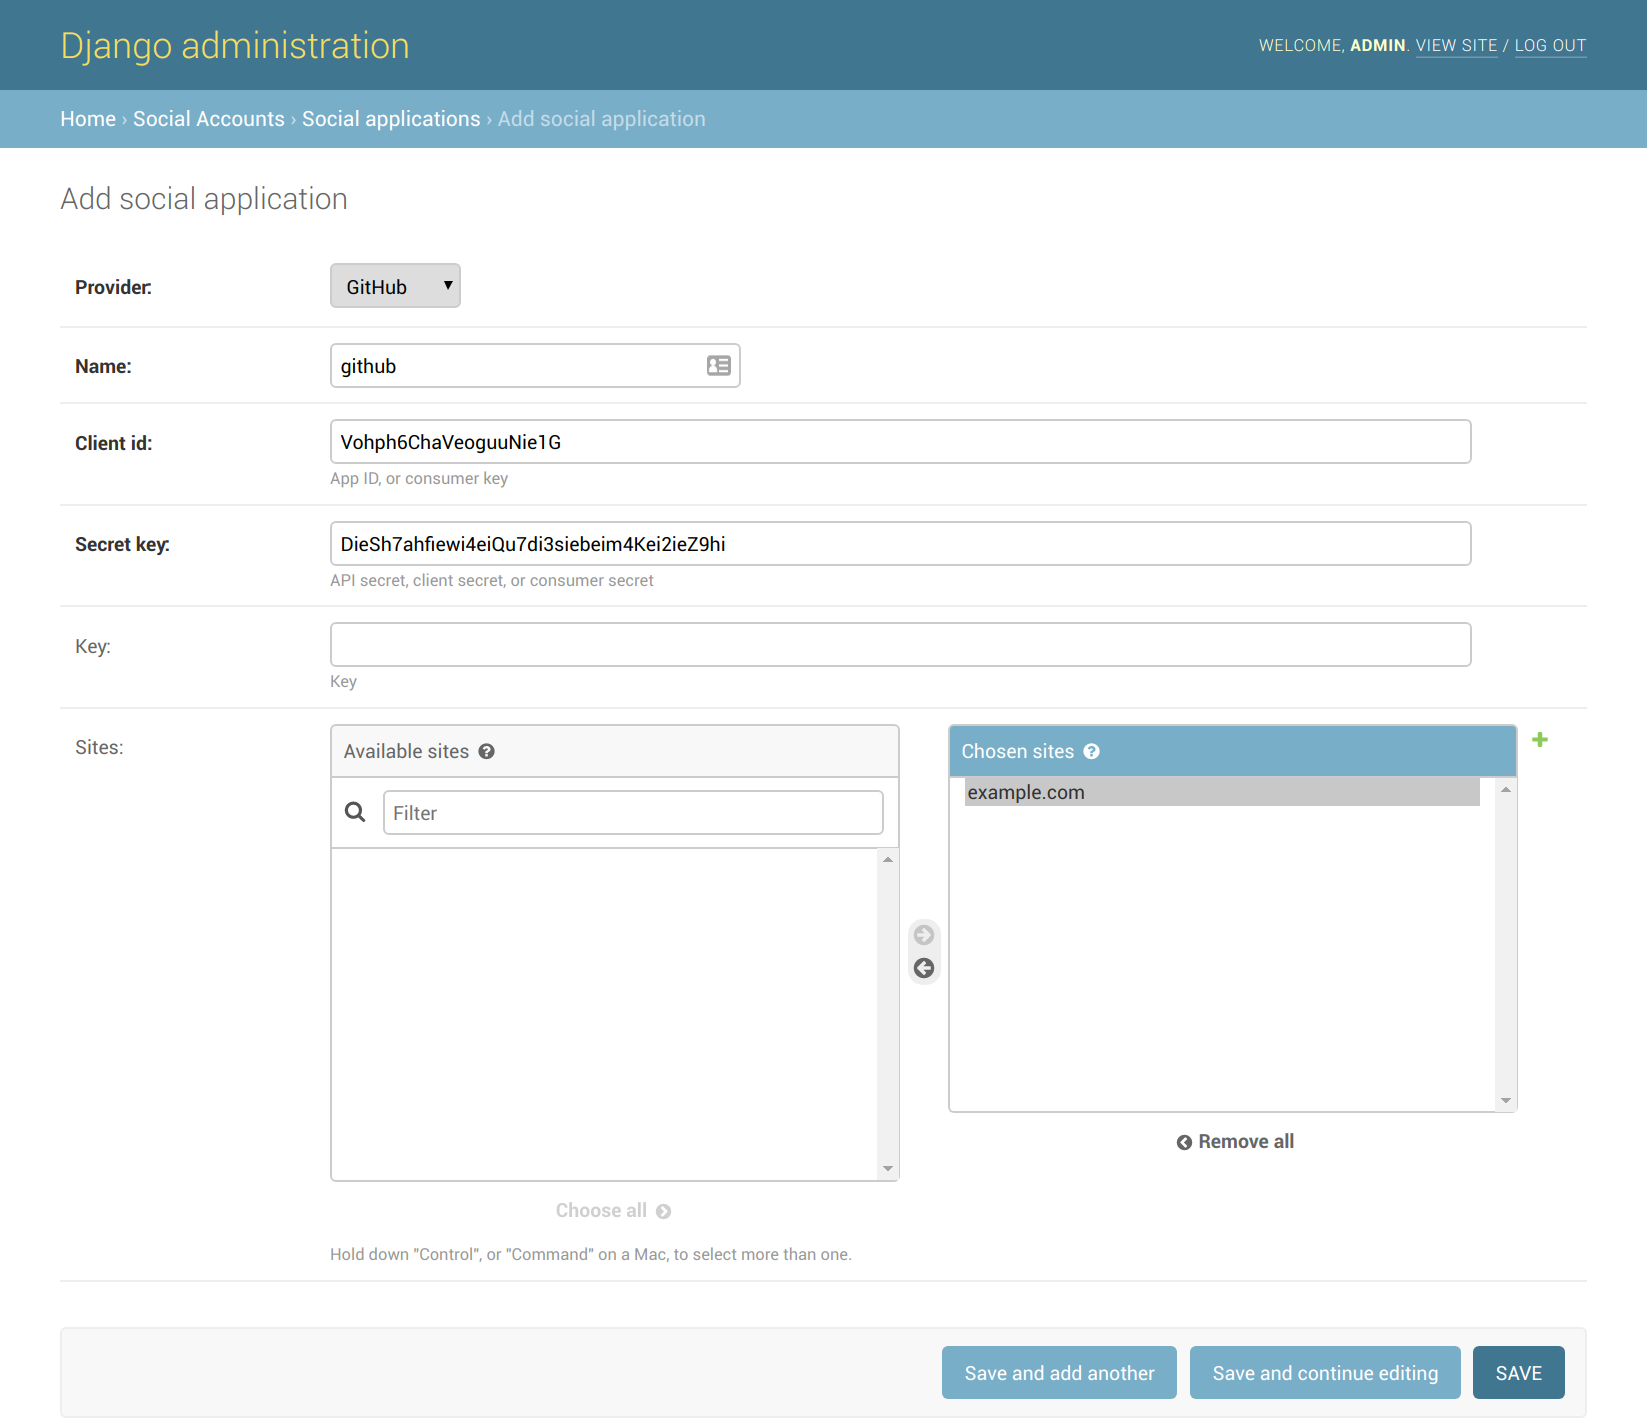
- Navigate to
https://<your_mailman_hostname>/admin/socialaccount/socialapp/add/and fill in the values you got from GitHub. Make sure you click Choose all to enable this auth provide for your django site, then click Save.
Now you should be able to login to your mailman site with GitHub, and see your account's connections at https://<your_mailman_hostname>/accounts/social/connections/


