Mailman: Difference between revisions
Appearance
imported>Benley Add most of the procedure to get it working |
imported>Benley Make editing configuration.nix a deployment step |
||
| Line 10: | Line 10: | ||
* letsencrypt to acquire TLS certificates for nginx | * letsencrypt to acquire TLS certificates for nginx | ||
==== configuration.nix | === Deployment steps === | ||
* Edit <code>/etc/nixos/configuration.nix</code> and add this stuff: | |||
<syntaxhighlight lang="nix"> | <syntaxhighlight lang="nix"> | ||
{ config, pkgs, ... }: | { config, pkgs, ... }: | ||
| Line 91: | Line 93: | ||
} | } | ||
</syntaxhighlight> | </syntaxhighlight> | ||
* Install and start the services: | * Install and start the services: | ||
Revision as of 06:40, 20 February 2020
Running Mailman on NixOS
Requires at least NixOS 20.03; the services.mailman module in NixOS 19.09 is insufficient.
This example includes:
- Postfix as the MTA
- uwsgi to host Mailman's web interface and archives (Postorius and Hyperkitty)
- nginx to terminate TLS, proxy to uwsgi, and serve static assets
- letsencrypt to acquire TLS certificates for nginx
Deployment steps
- Edit
/etc/nixos/configuration.nixand add this stuff:
{ config, pkgs, ... }:

let
  OWNER_EMAIL = "postmaster@example.org";  # Change this!
  MAILMAN_HOST = "mailman.example.org";    # Change this!
in

{
  services.postfix = {
    enable = true;
    relayDomains = ["hash:/var/lib/mailman/data/postfix_domains"];
    config = {
      transport_maps = ["hash:/var/lib/mailman/data/postfix_lmtp"];
      local_recipient_maps = ["hash:/var/lib/mailman/data/postfix_lmtp"];
    };
  };

  services.mailman = {
    enable = true;
    siteOwner = OWNER_EMAIL;
    webUser = config.services.uwsgi.user;
    hyperkitty.enable = true;
    webHosts = [MAILMAN_HOST];
  };

  # Make sure that uwsgi gets restarted if any django settings change.
  # I'm not sure why this isn't covered by the "before" and
  # "requiredBy" settings present in mailman-web.service. Maybe
  # because it's a oneshot and not a daemon?
  systemd.services.uwsgi.restartTriggers = [
    config.environment.etc."mailman3/settings.py".source
  ];

  # Tweak permissions so nginx can read and serve the static assets
  # (/var/lib/mailman-web defaults to mode 0600)
  systemd.services.uwsgi.preStart = ''
    chmod o+x /var/lib/mailman-web
  '';

  services.uwsgi = {
    enable = true;
    plugins = ["python3"];
    instance = {
      type = "normal";
      pythonPackages = (
        # TODO: I hope there is a nicer way of doing this:
        self: with self.override {
          overrides = self: super: { django = self.django_1_11; };
        }; [ mailman-web ]
      );
      socket = "127.0.0.1:33140";
      wsgi-file = "${config.services.mailman.webRoot}/mailman_web/wsgi.py";
      chdir = "/var/lib/mailman-web";
      master = true;
      processes = 4;
      vacuum = true;
    };
  };

  security.acme.email = OWNER_EMAIL;
  security.acme.acceptTerms = true;

  services.nginx = {
    enable = true;
    recommendedProxySettings = true;
    virtualHosts.${MAILMAN_HOST} = {
      enableACME = true;
      forceSSL = true;
      locations."/static/".alias = "/var/lib/mailman-web/static/";
      locations."/".extraConfig = ''
        uwsgi_pass 127.0.0.1:33140;
        include ${config.services.nginx.package}/conf/uwsgi_params;
      '';
    };
  };

  networking.firewall.allowedTCPPorts = [ 80 443 ];
}
- Install and start the services:
[root@mailman:~]# nixos-rebuild switch
- Generate initial
postfix_domains.dbandpostfix_lmtp.dbdatabases for Postfix:
[root@mailman:~]# sudo -u mailman mailman aliases
- Create a django superuser account. Be careful to run this only as the
uwsgiuser in/var/lib/mailman-webor you will run into permission problems later.
[root@mailman:~]# cd /var/lib/mailman-web
[root@mailman:/var/lib/mailman-web]# sudo -u uwsgi mailman-web createsuperuser
### Using settings module from /etc/mailman3/settings.py   ####
Username (leave blank to use 'uwsgi'): root
Email address: postmaster@example.com
Password:
Password (again):
Superuser created successfully.
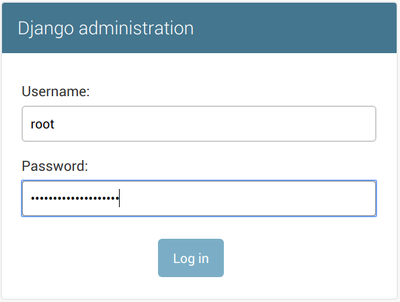
- Navigate to
https://<your_mailman_hostname>/adminin a web browser and login to the Django admin interface:
- Navigate to
https://<your_mailman_hostname>/admin/sites/site. Click on the example.com site, change it to your desired domain name, and hit Save. This configures the web serving domain, not the domain used for email.


